Monday, January 10, 2011

This Lil' Birdie is COLD

So in case you didn't know before now, I live in west-central Alabama.  Right across the river from this...
(Picture from Here)
Yep, that's Bryant-Denny Stadium on the University of Alabama's campus.  And we're known for a couple of things around here.  One of them being football.  Another is our "mild climate". (There's lots more... I'll give you a "tour" someday...)

Well, this week started off COLD!  It "snowed" last night (for like .2 seconds) and then spit frozen rain all over our pretty city.  Which means I woke up to this...

I took this picture after my car had been running for 10 or more minutes and I had scraped all of the ice off the windows.  I scraped over an inch of ice off my car and have the battle wounds on my hands to prove it was solid ice (thanks, Dad, for the ice scraper from '93!).  And let me tell you, it's cold in Alabama when the ice on the hood of the car doesn't melt even once the engine is warm.

Me personally, I LOVE winter weather just because I love my winter clothes.  But "winter" around here normally means highs in the 50s, not the 30s.  Every once in a while we'll get a really cold cold front, but for the most part, winter just means fun clothes.  This winter has made me realize why people up north move to Florida.

And for those of you who actually do live in areas of the country that get snow and freezing rain on a normal basis, my heart goes out to you.  Until summer.  Then you need to feel sorry for me and my 100+degree days!

Keep warm, friends, it's cold outside!  I'm going to buy an electric blanket.... or 6!!

Oh, and p..s ROLL DUCKS ROLL!

Tuesday, January 4, 2011

This Lil' Birdie's Favorite Things Part 1

I'm an extremely opinionated person {if you hadn't figured that out by now}.  So I've decided to share some of my favorite things with you!

Let's start with Red Ticking Stripes...

Available on Etsy.com
Oh, why must you be so adorable?!

Available on Etsy.com


J'adore!

Available on Etsy.com

Burlap AND a red ticking stripe?! Be still my heart!!!

My next project is going to have to have some sort of red ticking stripe in it... I just can't resist anymore!

P.s. Can you tell that I'm a*little* obsessed with Etsy as well? 'Cause I am... 

Monday, January 3, 2011

Happy New Year!

Happy New Year! Yes, I may be a day or two (or three) later than most, but I figure January 3rd rounds back to January 1st, right?

I decided to share my "resolutions" with you this year because I am all for some accountability and by putting them here, This Lil Birdie will have to actually hold myself to doing then right. So here goes...

1. Blog 2 or more times per week.
This is a win for both of us! I get to share my silly lil' thoughts and you'll get fun tutorials, recipes, and pictures! Aren't you excited?!?! {you should be}

2. Exercise.
Generalize much? Well, I'll get more specific. My goal is to move for more than 30 minutes more than 3 times a week. Move. Walk. Run. P90x. Whatever. Just move.

3. Budget & save.
I'm pretty much a shop-a-holic that likes expensive things. This is not very good for my credit cards or my bank account.  So after a year and a half of big girl bills, I've finally made a budget and my resolution is to stick to it and SAVE!  Good luck to me but it's probably going to mean more did-it-myself tutorials for you!

So that's that. My 2011 game plan. Hold me accountable & I'll be sure to reward you with fun posts at least 2 times a week :)

Happy 2011 everyone!! What are your goals for this year? Do you set goals you know you can reach or do you set unattainable goals?

Thursday, December 16, 2010

This Lil' Birdie Likes Food: Cheerio Bars

Two posts in one day!  YAY!  Both food!  YAY!  Bad for diet but who cares!

Cheerio bars.

I think these might just be the perfect snack.  Salty, sweet, peanut butter, cheerios... What's not to love?!

What you'll need:

5 cups Cheerios
3 tbsp butter (yes, this must be real butter.  because I say so.)
1 bag mini marshmallows
1/2 cup peanut butter (crunchy, smooth, organic, doesn't matter)

Toss all the butter into a big ol' pan and heat it over low heat.  Don't burn your butter (it smells icky)


Once it's all good & melted, toss in your marshmallows & keep it on low heat
Now, you want these to completely melt.  No big ol' lumpy clumps.... It should look less like this and more like this...
When you get here, dump in your peanut butter and stir it all up...
Obviously I used crunchy pb cause that's all I had and it's just better that way....
Then take it off the heat and throw in your cheerios...
Mix well and be sure you've greased (aka: Pam'd) a glass baking dish...

Then dump your cheerio/marshmallow/peanutbutter mixture into the baking dish...

I stuff my hand into a plastic bag and push it down flat.  Like such.

And then you just let them cool and then cut into squares.  Cheerio Bars.  Yum!


P.s. This recipe is super easy to half which is what I did for this recipe since I had a half a bag of marshmallows cause I ate the rest.... :)

This Lil' Birdie Likes Food: Chocolate Chip Pecan Pie

I promised this recipe a few days ago, but I'm a smudge late.... Apologies!

I could live off of Chocolate.  Couldn't you?

So this year, for Thanksgiving, instead of basic pecan pie (icky nasty caro syrup filling nastyness), I decided to make Chocolate Chip Pecan Pie.  Yes, you read that right.  Chocolate Chip.  Pecan Pie.  Yum!  And that's exactly what it was! YUM!

This was my first time ever making pie, and let me just say, it was super simple!  Here's how you do it:

You'll need:

Pie Crust (refrigerated, uncooked, just one in the pack of 2)
Chocolate chips (semi-sweet) 1 cup
Caro syrup (light, 1 cup)
Brown sugar (1 tightly packed cup)
Vanilla extract (1.5 tsp)
Whole pecans (1 cups) 
Chopped pecans (1/2 cup)
Butter (2 tsp, melted)
3 whole eggs
(not shown, 1/2 tsp salt)

Unroll one of the pie crusts and press it into a 9" pie pan (mine's pyrex... never burns the crust!  My dream pie pan?  This one... so pretty!)

Then mix all of the ingredients except for the whole pecans together in a big bowl... It'll be really soupy...

Then pour it all in your pie pan...
And then just top it with your whole pecans & bake for 50 minutes at 350degrees F (if the edges of the pie crust start getting brown too quick, cover them with foil).  Cool completely on a wire rack and you can store this for up to 3 days before you need to serve it (covered with foil, of course!)

Then consume....
Best served warm with whipped cream, vanilla ice cream, and a lil' chocolate syrup.  Decadent?  Yes.  Necessary?  ABSOLUTELY

Enjoy :)

Monday, December 13, 2010

My Favorite Things Part 1

I'm picky by nature.  I can't help it.  So here are a few of my favorite things (and trust me, I'm picky enough to say with authority that these are the "best"....)

Mascara (but only this or Lorac Lotsa Lash)


Pretty much anything burlap, ruffled, or from Etsy... Even better? All three in one!


Truthfully, I love anything sweet but apart from cupcakes, these are my favorites...

Cheerio bars.  Yum!  I'll share my recipe tomorrow -- trust me, you NEED them in your life :)

Merry Christmas in 12 days!! YAY!!


Sunday, December 5, 2010

This Lil' Birdie is Crafty: Felted Flowers

So I'm pretty much the queen of flowers right now... They're pretty much the ultimate accessory for me!  I wear them on jackets...
(UGH... that FACE!!!)
I wear them on belts....

And more than anything else, I wear them on shirts...

Dresses up that insanely boring ol' t-shirt doesn't it?

Well, because I love ya so very very much, I'm going to show you how to make this adorable houndstooth flower!
This lil' guy has become a staple on my red winter jacket just to spruce things up (especially during football season... Roll Tide!), and really this is incredibly easy to make.  And of course, it's hot glued (like most every craft project I do...).

Here's what you need:
-1 piece of felt (not felted wool fabric; I'm talking cheap-o felt squares in the kids craft section at Hobby Lobby 4/$1.00... I picked houndstooth, but there are about 60 other choices -- glittery silver, anyone?)
- hot glue (surprise surprise! <--- it took me 4 times to spell that right....)
- 1 pin or clip or something to attach it to your clothing/headband/whatever...
- Pearls, beads, or something to cover the hideous center of the flower (you'll see what I mean in a minute)
- 15-ish minutes & some Advil for the hot glue burns (no, seriously)

Start by drawing & cutting out 6 large petals, six smaller petals, and a circle (not pictured) from your felt square....
I free-handed mine which is why they're really not perfect.  Just as an fyi, on printed felt it's easier to draw & cut from the back (non-printed) side... I used a sharpie.

Next, you're going to use your hot glue gun to smudge (yes, that's a real word) the ends of each of the petals like this...
 Just make a little accordion fold & get some glue in between.  No worries if they're perfect, you won't be able to tell.  Do this to the 6 big petals, and then the 6 smaller petals just fold the bottom corners towards each other & glue... you'll see... I didn't take a picture...

Then you'll glue each petal onto the felt circle you cut earlier... Start with the bigger petals on the bottom & just arrange them to look like a flower-ish thing-a-ma-doo....
Easy as pie... with hot glue burns... yum!

Then do the same thing with the smaller petals but this time you'll glue them on top of the bigger petals.  I like to arrange them pretty before I start glue-ing....
See how the smaller petals are just glued at the bottom instead of the little accordion I showed you earlier?  Easier to do... Prettier on top....

So see what a hideous center we have there?  No worries, this is where your pretties come in!  I used one big pearl and tiny grey-ish pearls to cover the center.. Just hot-glue them into place....

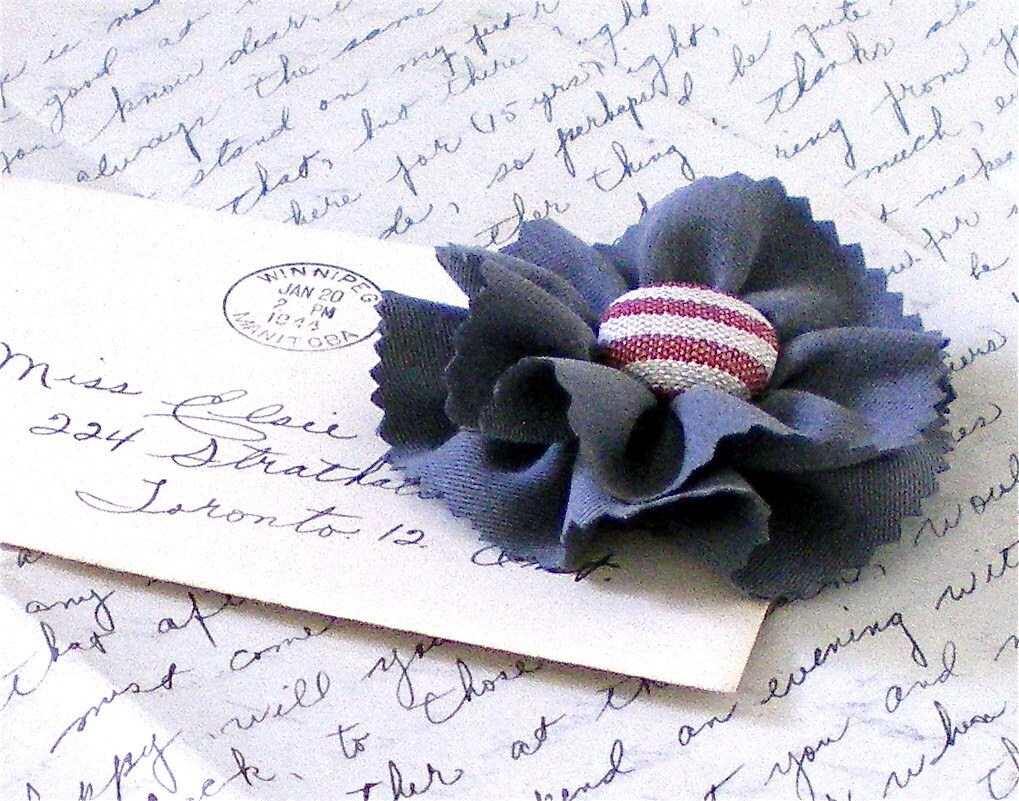
I made one the other day and used a beautiful vintage button I bought from Etsy.... It was beauti-mous!

Then glue your holder (pin/barrette/etc) to the TOP of the felt circle on the backside... very much like what we did for the Pretty Flowers...

And voila!  You're done!  Now go wear your flower with a big ol' smile (proven to make you feel better about everything -- flowers & smiles that is!).

I'll post a picture of my flower on my coat soon... Until then, go make your own & link to pictures of yours if you do make these (and P.s. these make GREAT Christmas presents... I probably just ruined a few of my own gifts... )